Understanding what your Ford’s check engine light means can be frustrating without a scanner. But don’t worry! There are ways to read Ford OBD2 codes without any special equipment. This guide will walk you through several methods for retrieving diagnostic trouble codes (DTCs), helping you pinpoint the issue and potentially save on diagnostic fees.
Decoding Ford Trouble Codes: OBD1 vs. OBD2
Before diving in, it’s crucial to understand which system your Ford uses: OBD1 (On-Board Diagnostics 1) or OBD2 (On-Board Diagnostics 2). OBD1 was used in Ford vehicles manufactured before 1996 and relied on manufacturer-specific connectors and code retrieval methods. OBD2, standardized in 1996, uses a universal connector and simplified diagnostic procedures. Knowing your system is the first step in decoding those pesky trouble codes.
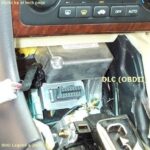
 OBD2 Port Location
Reading Ford OBD1 Codes Without a Scanner
For older Ford models with OBD1, retrieving codes requires a bit of ingenuity. Here are two effective methods:
1. The Check Engine Light Flash Method
This method involves interpreting the flashes of your check engine light.
- Preparation: Ensure your car is parked, the engine is off, and all accessories are turned off.
- Locate the Diagnostic Connector: This connector is typically located under the dashboard on the driver’s side.
- Key On, Engine Off: Turn the ignition key to the “Run” position without starting the engine.
- Observe the Flashing Light: The check engine light will flash a series of codes. Each code consists of two sets of flashes separated by a brief pause. For example, two flashes, a pause, then three flashes would indicate code 23.
- Decode the Code: Refer to your vehicle’s repair manual or search online for a Ford OBD1 code list to decipher the meaning of the flashes.
2. The Paperclip Trick for OBD1 Codes
This method involves using a paperclip to jump specific terminals on the diagnostic connector.
- Safety First: Turn off the engine and remove the ignition key.
- Find the Connector: Locate the diagnostic connector under the dashboard.
- Create a Jumper Wire: Bend a paperclip into a “U” shape.
- Connect Terminals: Insert the ends of the paperclip into the appropriate terminals for self-test initiation (consult your vehicle’s repair manual for the correct terminals).
- Key On, Engine Off: Turn the ignition key to the “Run” position.
- Read the Flashes: The check engine light will flash codes as described in the previous method.
Reading Ford OBD2 Codes Without a Scanner
Retrieving codes from OBD2 systems can be achieved through these methods:
1. The Odometer Secret Code Method
Some Ford models allow you to access diagnostic codes through the odometer.
- Key Off, Press and Hold: With the ignition key off, press and hold both the trip odometer reset button and the odometer select button.
- Key On, Continue Holding: Turn the ignition key to the “On” position (without starting the engine) while continuing to hold the buttons.
- Release and Read: Release the buttons. The odometer display may cycle through various information before displaying diagnostic trouble codes.
2. Using a Jumper Wire on the OBD2 Port
This method involves shorting specific pins on the OBD2 port, usually located under the dashboard on the driver’s side.
- Locate the OBD2 Port: Identify the 16-pin OBD2 connector.
- Connect with Jumper Wire: Use a jumper wire to connect specific pins (typically pins 4 and 13, but consult your vehicle’s manual for confirmation).
- Key On, Engine Off: Turn the ignition key to the “On” position.
- Read the Flashes: The check engine light will flash codes as described in the OBD1 section.
Conclusion
Reading Ford OBD2 codes without a scanner is possible using these methods. While a dedicated scanner provides more detailed information, these techniques offer a valuable starting point for diagnosing your Ford’s check engine light. Remember to always consult your vehicle’s repair manual for specific instructions and safety precautions. Understanding these codes empowers you to address potential issues promptly and confidently.
