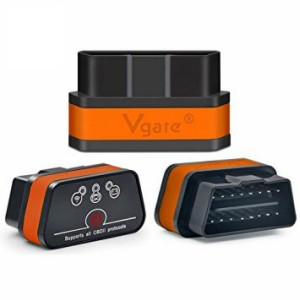
OBD2 diagnostics, also known as On-Board Diagnostics, have become indispensable for car repair and maintenance. These tools offer a cost-effective way to understand and troubleshoot vehicle issues, making them popular among professional mechanics and DIY enthusiasts alike. This article delves into the intricacies of OBD2 diagnostics, explaining how they communicate with your vehicle and detailing the various diagnostic modes available.
How OBD2 Diagnostics Communicate with Your Vehicle
After connecting an OBD2 diagnostic device to your vehicle’s OBD2 port, communication is established. The system scans for available device addresses, primarily focusing on addresses $00 to $17, which are reserved for the engine control unit (ECU). Upon identifying the ECU, the device connects and initiates diagnostic communication using one of the nine OBD2 diagnostic modes. Not all vehicles support all nine modes, with older models typically supporting fewer modes than newer ones.
Decoding the Nine OBD2 Diagnostic Modes
Each mode provides specific information about the vehicle’s systems. Understanding these modes is crucial for accurate diagnosis and repair.
Mode 1: Current Data
Mode 1 retrieves Parameter IDs (PIDs) representing real-time system values, including:
- Analog signals: Engine speed, temperature, lambda sensor voltage.
- Digital signals: Clutch engagement, throttle position.
- Calculated parameters: Injector pulse width.
- System status: A/C engagement, CAN bus presence, ABS/ASR/ESP presence.
Each sensor has a unique PID. For instance, engine speed is PID 12. The OBD standard includes 137 PIDs, but not all vehicles support all of them.
Mode 2: Freeze Frame Data
Mode 2 captures a snapshot of system values at the moment a fault occurred. This “freeze frame” data includes the fault code (e.g., P0122 for a throttle position sensor error) along with parameters like engine speed, coolant temperature, and engine load at the time of the fault. This helps pinpoint the conditions that triggered the error.
Mode 3: Diagnostic Trouble Codes (DTCs)
This mode retrieves stored DTCs, indicating specific faults. For example, P0100 signifies a problem with the mass airflow sensor. Mode 3 displays confirmed faults that have occurred at least three times, ensuring the error is not a random glitch.
Mode 4: Clear/Reset Diagnostic Information
Mode 4 clears stored DTCs, freeze frame data, and any test results from Mode 5 and pending codes from Mode 7. This resets the system, allowing for a fresh diagnosis after repairs.
Mode 5: Oxygen Sensor Monitoring
Mode 5 tests the oxygen sensor by recording its signal. It provides access to Test Identification (TID) values used for evaluating oxygen sensor performance. Nine TIDs are defined (TID $01 to $09), but manufacturers can define additional ones.
Mode 6: On-Board Monitoring Tests Results
Mode 6 provides results for component tests not continuously monitored. Its implementation varies between manufacturers, as the OBD standard doesn’t define specific requirements for this mode.
Mode 7: Pending Diagnostic Trouble Codes
Mode 7 displays pending DTCs – errors that have occurred once or twice but haven’t been confirmed yet. These codes offer insights into potential developing problems.
Mode 8: Control of On-Board System, Test or Component
Mode 8 allows for targeted testing of specific actuators, such as the fuel vapor purge valve, EGR valve, or intake manifold runner control. This helps verify the functionality of individual components.
Mode 9: Vehicle Information
Mode 9 retrieves vehicle and engine identification information, including the VIN, CIN, CVN, engine code, and transmission type.
Conclusion
OBD2 diagnostics provide a crucial window into the inner workings of your vehicle. Understanding how these systems function and interpreting the data they provide empowers you to diagnose and address car problems efficiently. From reading and clearing trouble codes to monitoring sensor performance, mastering Obd2 Dijagnostika is essential for anyone involved in vehicle maintenance and repair.
