Can a Raspberry Pi interpret and display data from your car’s OBD2 port? Absolutely! This article delves into the journey of building a carputer using a Raspberry Pi to output real-time vehicle diagnostics. We’ll explore the challenges, solutions, and triumphs of creating a custom in-car display system.
Inspired by the multi-function display in modern cars, this project aimed to leverage a Raspberry Pi to create a custom boost gauge and comprehensive data display. This involved learning Python, wiring an OLED display, retrieving OBD2 data via Bluetooth, setting up a power supply, and configuring a lightweight Raspbian OS.
Choosing the Right Hardware and Software
The project utilized a Raspberry Pi 2 and a Vilros Ultimate Starter Kit as a foundation. Key components included:
- Raspberry Pi 2: The brains of the operation.
- 16×2 Character OLED Display: Chosen for readability in sunlight and compact size.
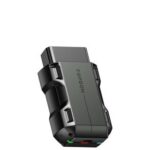
- OBD-II Bluetooth Adapter: To wirelessly access vehicle data.
- Power Supply: Initially a Mausberry car power supply, later replaced with a UPS PIco for improved reliability.
- Voltage Regulator: To step down the car’s 12V power to 5V for the Raspberry Pi.
- Python and python-OBD Library: For scripting and interacting with the OBD2 adapter.
Wiring the OLED Display: Trial and Error
Wiring the OLED proved challenging due to limited documentation. Initial attempts resulted in a fried display. Success came after finding a helpful forum post and carefully following its guidance.
Establishing Communication: Bluetooth and Serial Connections
Connecting the Raspberry Pi to the OBD2 adapter required configuring Bluetooth and establishing a serial connection. The OBD2 adapter was paired with a Bluetooth USB adapter, and the connection was mapped to a virtual serial port accessible through Python. Automating this process on startup involved using the /etc/rc.local file.
Python Scripting with python-OBD
The python-OBD library simplified the process of retrieving and displaying OBD2 data. This library provided a well-documented and actively maintained solution for interacting with the vehicle’s diagnostic port.
Powering the Pi In-Car: Overcoming Challenges
Initially, a Mausberry car power supply was used. However, it proved unreliable, shutting down the Pi after a short period. After troubleshooting and attempting a replacement, a UPS PIco was chosen. This provided a stable power solution with a built-in battery backup and safe shutdown capabilities.
Final Installation and Housing
With a working system, the OLED display was installed in the car’s dashboard. A custom housing was created from perspex plastic to improve aesthetics and protect the display.
Conclusion: Raspberry Pi OBD2 Output Success
This project demonstrates that a Raspberry Pi can successfully output OBD2 data, creating a custom carputer. While challenges were encountered, perseverance and resourcefulness led to a functional and informative in-car display. This exemplifies the power of DIY electronics and the versatility of the Raspberry Pi platform.
