An Obd2 To Serial Interface allows you to tap into your car’s computer system and access a wealth of diagnostic information. This guide explores the hardware, commands, and connections needed to establish communication between your vehicle and a computer or microcontroller using an OBD2 to serial adapter.
Understanding OBD2 and Serial Communication
On-Board Diagnostics, Second Generation (OBD2), standardized in 1996, provides a universal method for accessing vehicle diagnostic data. This data is transmitted through a standardized connector and communication protocol. An OBD2 to serial interface converts these signals into a format understandable by computers and microcontrollers via a serial port (UART). This enables DIY diagnostics, data logging, and custom applications. The STN1110 chip is a common OBD to UART interpreter, compatible with the ELM327 command set.
Hardware Requirements for OBD2 to Serial Communication
For a successful OBD2 to serial connection, you’ll need:
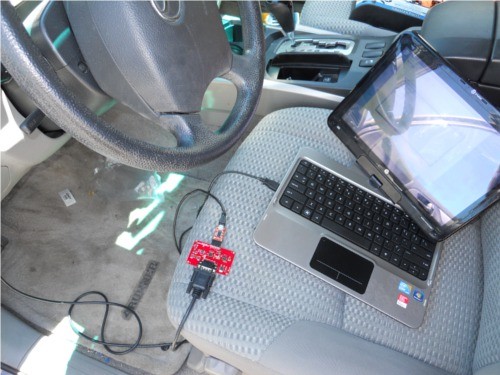
- OBD2 to Serial Adapter: This device, often featuring an STN1110 or similar chip, translates OBD2 signals to serial data.
- OBD2 Connector Cable: Connects the adapter to your vehicle’s OBD2 port.
- Serial Cable (e.g., FTDI): Connects the adapter to your computer’s USB port, providing a virtual serial port.
- Computer or Microcontroller: To receive and interpret the serial data. For microcontroller projects, an Arduino Uno with a serial LCD is a popular choice.
- Soldering Iron and Solder: For connecting headers to the OBD2 adapter (if necessary).
Establishing Communication: First Steps with an OBD2 to Serial Interface
-
Connect to Your Vehicle: Plug the OBD2 connector cable into your car’s OBD2 port, usually located under the dashboard.
-
Connect to Your Computer: Connect the OBD2 to serial adapter to your computer using an FTDI cable.
-
Open a Serial Terminal: Use a serial terminal program (e.g., Putty, Tera Term) on your computer. Configure it to 9600 baud rate, 8 data bits, 1 stop bit, and no parity.
-
Test Communication: Send the “ATZ” command to reset the OBD2 adapter. You should receive a startup message confirming communication. Follow this with “ATRV” to check the vehicle’s battery voltage.
Decoding OBD2 Commands with a Serial Interface
OBD2 commands use hexadecimal codes (ASCII) to request specific data from the vehicle’s ECU.
-
Mode and PID: Each command starts with a mode (e.g., Mode 01 for current data) followed by a Parameter ID (PID) specifying the requested data (e.g., PID 0C for engine RPM). For example, “010C” requests the engine RPM.
-
Response Format: The response also follows a specific format. It begins with the mode (plus 0x40), followed by the PID, and then the data bytes. Data is often encoded and requires conversion (e.g., engine RPM is in quarters of RPM).
Using an Arduino with Your OBD2 to Serial Interface
An Arduino can enhance your OBD2 projects. By connecting the adapter’s TX and RX lines to the Arduino’s RX and TX pins, you can process and display data on an LCD screen. This allows for creating custom dashboards or data loggers. SoftwareSerial library is essential for serial communication with the LCD while using the Arduino’s hardware serial for the OBD2 adapter.
Expanding Your OBD2 to Serial Projects
Numerous resources are available to enhance your OBD2 to serial interface projects:
-
ELM327 Datasheet: Provides a comprehensive list of supported AT commands and PIDs.
-
OBD2 PID Databases: Detail the meaning of various PIDs for different vehicle manufacturers.
-
Open-Source Software: Tools like RealTerm can simplify data logging and visualization.
By understanding the fundamentals of OBD2 to serial communication, you can unlock a wide range of automotive applications, from simple diagnostics to complex data analysis and custom projects.