Elm Wifi Obd2 Adapters provide a convenient way to access your car’s diagnostic data. This guide offers a comprehensive walkthrough on connecting your adapter to your vehicle and smartphone, using the Car Scanner app as an example.
Connecting your ELM WiFi OBD2 adapter involves a few key steps. First, locate your car’s OBDII port, usually under the dashboard on the driver’s side. Plug the adapter in and turn your car’s ignition to the “on” position (or start the engine). If your adapter has a power button, press it.
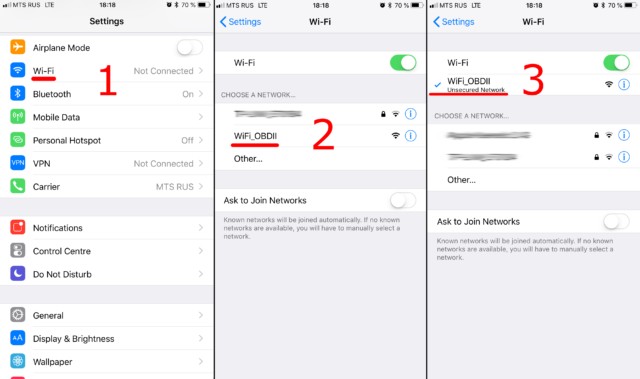
Next, enable WiFi on your smartphone or tablet. Search for the WiFi network created by your ELM327 adapter. Common names include “OBDII,” “OBD2,” “WIFI_OBDII,” or a name related to the adapter brand (e.g., “VLINK” for VGate adapters). Connect to this network. Most adapters don’t require a password, but consult your adapter’s documentation if one is needed. The network name will never be your car’s brand name.
Now, open the Car Scanner app and navigate to Settings (gear icon). In Settings, select “Adapter” (or “Connection” in older app versions). Choose “Wi-Fi” as the connection type. Verify the adapter’s IP address and port. The default is often 192.168.0.10 for the IP address and 35000 for the port. However, refer to your adapter’s documentation for specific settings.
Once you’ve confirmed the connection details, tap the “Connect” button.
For subsequent connections, ensure your device is connected to the adapter’s WiFi network and simply tap “Connect” in the app. While this guide utilizes the Car Scanner app, the general process applies to other OBD2 software. Always consult your adapter and app documentation for specific instructions. A successful connection to your ELM WiFi OBD2 adapter empowers you to monitor your vehicle’s performance, diagnose potential issues, and gain valuable insights into your car’s health.