The Harley-Davidson diagnostic connector, often referred to as the Harley Obd2 Connector, allows motorcycle enthusiasts to tap into their bike’s computer system and understand its health. Utilizing a compatible diagnostic tool, riders can access valuable information about their Harley, potentially saving time and money on maintenance and repairs. This guide will walk you through the essentials of the Harley OBD2 connector.
Understanding the Harley OBD2 Connector
Harley-Davidson motorcycles, like most modern vehicles, utilize an onboard diagnostics system (OBD) to monitor various engine and system functions. The Harley OBD2 connector provides a physical interface for accessing this system. While not technically OBD2 compliant like cars, the Harley connector serves a similar purpose, allowing communication with the motorcycle’s Electronic Control Units (ECUs). These connectors come in two main varieties: 4-pin and 6-pin, depending on the model year and specific motorcycle.
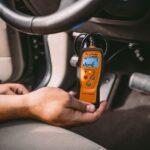
Connecting to the Harley OBD2 connector typically involves a diagnostic tool, often a Bluetooth adapter that interfaces with a smartphone app. This setup enables users to read and clear fault codes, monitor live engine data, and access other vital information.
Locating the Harley OBD2 Connector
The location of the Harley OBD2 connector varies depending on the motorcycle model. Common locations include:
- Under the Seat: Many Harley models have the connector tucked away beneath the seat.
- Side of the Motorcycle: Some models feature the connector on the side, often near the battery or fuse box.
- Front of the Engine: In certain cases, the connector might be located towards the front of the engine compartment.
Consulting your motorcycle’s owner’s manual is the best way to pinpoint the exact location of the diagnostic connector.
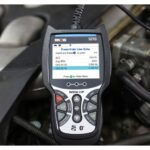
Utilizing a Harley OBD2 Scanner
Once you’ve located the connector, using a Harley OBD2 scanner is relatively straightforward:
- Turn Off the Ignition: Before connecting any device, ensure the motorcycle’s ignition is switched off.
- Connect the Adapter: Plug the diagnostic adapter into the Harley OBD2 connector, ensuring a secure connection.
- Turn on the Ignition: Turn the ignition key to the “Run” position but do not start the engine. Some scanners may require the engine to be running.
- Connect to the App: Pair the Bluetooth adapter with your smartphone and launch the compatible diagnostic app. This app will guide you through the process of reading and clearing codes.
Benefits of Using a Harley OBD2 Connector
Accessing your Harley’s diagnostic system via the OBD2 connector provides several advantages:
- Diagnose Problems: Identify the root cause of engine trouble codes, often before a noticeable issue arises.
- Clear Fault Codes: Reset the check engine light after addressing the underlying problem.
- Monitor Live Data: View real-time sensor readings like engine temperature, RPM, and fuel pressure.
- Save Money: Potentially avoid costly trips to the dealership for minor diagnostic tasks.
Choosing the Right Harley OBD2 Scanner
When selecting a Harley OBD2 scanner, consider the following factors:
- Compatibility: Ensure the scanner and accompanying app support your specific Harley model and year.
- Functionality: Determine the features you need, such as reading and clearing codes, live data monitoring, and data logging.
- User-Friendliness: Opt for a scanner with an intuitive interface and easy-to-understand software.
The Harley OBD2 connector is a valuable tool for any Harley owner seeking to understand and maintain their motorcycle. By utilizing a compatible diagnostic scanner, riders can empower themselves with the knowledge to address potential issues and keep their bikes running smoothly. Remember to always consult your owner’s manual for specific instructions related to your motorcycle model.