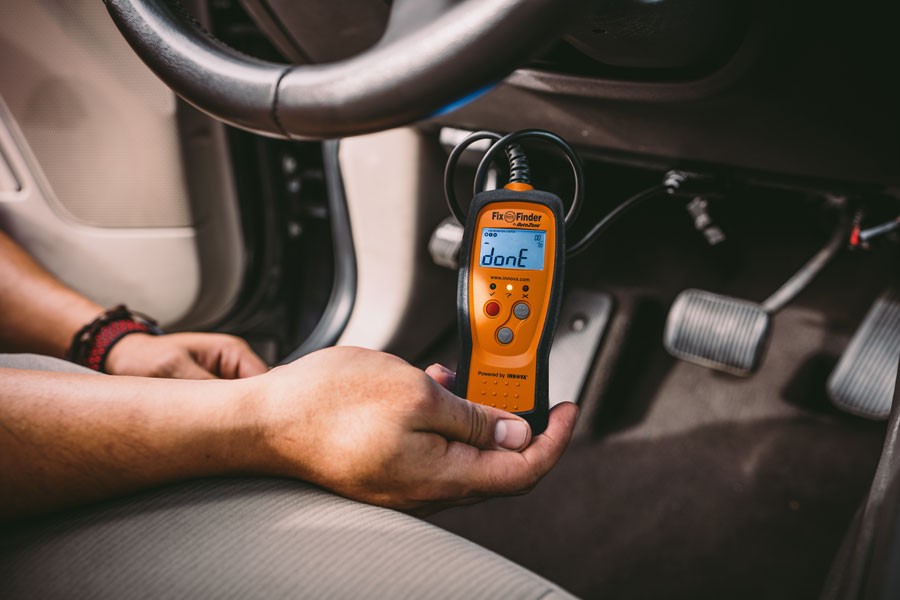
Connecting an OBD2 scan tool to your car might seem intimidating, but it’s a straightforward process that can save you time and money on auto repairs. This guide will walk you through how to use an AutoZone OBD2 scan tool, understand the codes, and leverage this knowledge for cost-effective car maintenance.
Locating and Connecting Your AutoZone OBD2 Scanner
The first step is finding your car’s OBDII port. This port is typically a 16-pin trapezoid-shaped connector located under the driver’s side dashboard. In some vehicles, it might be hidden within the center console or under the passenger side dash. Once located, connecting the AutoZone OBD2 scanner is simple:
- Turn Off Ignition: Ensure your car’s ignition is completely off before starting.
- Connect the Scanner: Align the scanner’s connector with the OBDII port and firmly push them together. A slight wiggle might be needed for a secure connection.
- Turn On Ignition: Turn the ignition key to the “On” position, but do not start the engine. This powers up the OBD2 scanner.
- Wait for Boot-up: Allow the scanner to complete its boot sequence. You might need to input information like engine size or VIN.
Navigating the AutoZone OBD2 Scanner Menu
After the boot-up, your AutoZone OBD2 scan tool will display a menu. Options vary depending on the scanner model, but common functions include:
- Read Codes: Displays Diagnostic Trouble Codes (DTCs) indicating potential issues.
- Erase Codes: Clears DTCs from the vehicle’s computer memory. Use caution, as this removes valuable diagnostic data.
- Live Data: Provides real-time sensor readings, allowing you to monitor various engine parameters.
- Freeze Frame: Captures vehicle data at the moment a DTC was set, providing valuable context for diagnosis.
- Vehicle Info: Displays basic vehicle information like VIN and engine size.
- I/M Readiness: Shows the status of emissions-related systems, crucial for smog checks.
Use the buttons on the scanner to navigate the menu. Arrow keys typically allow scrolling, and a designated button confirms selections. A “Back” button enables returning to previous menus.
Deciphering OBD2 Trouble Codes
 OBD-II scanner done reading trouble codes
When you select “Read Codes,” the AutoZone OBD2 scanner displays codes like “P0301.” Understanding these codes is key to diagnosing the problem. The format is one letter followed by four numbers:
- Letter: Indicates the system with the fault (P: Powertrain, B: Body, C: Chassis, U: Network).
- First Number: “0” denotes a generic code applicable to most manufacturers, while “1” signifies a manufacturer-specific code.
- Second, Third, and Fourth Numbers: Pinpoint the specific system and fault within that system. For example, “P0301” indicates a generic powertrain code related to a cylinder 1 misfire. Refer to an AutoZone code guide or online resources for detailed code definitions.
Saving Money with Your AutoZone OBD2 Scanner
An AutoZone OBD2 scan tool empowers you to save money on car repairs in several ways:
- Early Diagnosis: Identifying potential issues early can prevent them from escalating into more costly repairs.
- Smog Check Preparation: Verify your vehicle’s readiness for emissions testing using the I/M Readiness function.
- DIY Repairs: Diagnose and fix simple problems yourself, saving on diagnostic fees and labor costs. For example, a “P0138” code indicates a faulty oxygen sensor, a relatively easy DIY replacement. After the repair, use the scanner to clear the code.
Conclusion
Using an AutoZone OBD2 scan tool is a valuable skill for any car owner. It allows you to take control of your vehicle’s maintenance, diagnose potential problems, and save money on repairs. By understanding how to use the scanner and interpret the codes, you can become a more informed and empowered car owner. Visit your local AutoZone to purchase an OBD2 scanner and unlock the potential for DIY car repair.
