Connecting your computer to your car’s OBD2 port opens up a world of diagnostics and data. This comprehensive guide provides a step-by-step approach to successfully connect your computer to your vehicle’s OBD2 port using an OBDLink Bluetooth adapter.
Finding Your OBD2 Port and Connecting the Adapter
Before connecting to your computer, you need to locate your vehicle’s OBD2 port and plug in the OBDLink adapter. The OBD2 port is typically located under the dashboard, near the steering column. It may be hidden behind a panel or in the glove compartment.
Once located, firmly plug the OBDLink adapter into the OBD2 port. The green ‘Power’ LED on the OBDLink will illuminate, confirming a successful connection to the vehicle’s power. For Wi-Fi enabled OBDLink adapters, the ‘Wi-Fi’ light will blink every three seconds.
Enabling Bluetooth and Pairing with OBDLink
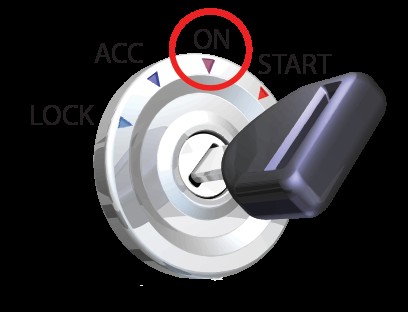
Next, turn your vehicle’s ignition key to the ‘ON’ position without starting the engine. This powers up the OBD2 system and allows communication with the adapter.
On your computer, ensure Bluetooth is enabled. If using a USB Bluetooth adapter, install the necessary drivers. For computers with built-in Bluetooth, consult your computer’s manual for activation instructions.
Press the ‘Connect’ button on your OBDLink adapter. The ‘BT’ light will blink rapidly, indicating it’s ready for pairing. You have a two-minute window to complete the pairing process.
In your computer’s system tray, right-click the Bluetooth icon and select ‘Add a Device’. Your computer will scan for nearby Bluetooth devices. Select ‘OBDLink’ and click ‘Next’.
Entering the PIN and Completing the Connection
You might be prompted to compare pairing codes or enter a PIN. If asked for a PIN, enter ‘1234’. This is the default PIN for most OBDLink devices. If given the option to pair without a code, choose that instead. Once successfully paired, Windows will confirm the installation.
If the installation fails, press the ‘Connect’ button on the OBDLink adapter again and repeat the pairing process.
Installing and Configuring OBDwiz Software
Download and install the latest version of OBDwiz diagnostic software. With the OBDLink paired and your vehicle’s ignition in the ‘ON’ position, launch OBDwiz.
Click the ‘Auto Detect’ button within OBDwiz. The software will automatically identify the correct COM port and baud rate for your OBDLink adapter.
Connecting to Your Vehicle’s ECU and Accessing Data
Once OBDwiz configures itself, click the ‘Connect’ button. The software will then detect the communication protocol used by your vehicle’s Engine Control Unit (ECU).
Choose the ECU with the most supported Parameter IDs (PIDs) and click ‘Continue’. You can now access various diagnostic functions within OBDwiz, including reading and clearing trouble codes, monitoring real-time data, and checking emissions readiness.
By following these steps, you can successfully connect your computer to your vehicle’s OBD2 port and unlock valuable diagnostic information. Remember to consult your vehicle and OBDLink manuals for specific instructions and troubleshooting.
