Creating a custom heads-up display (HUD) for your car that connects to your phone and OBD2 port can be a rewarding project. This post details the process of building such a device, including selecting components, wiring an OBD2 extension cable, and exploring potential display solutions. This project utilizes an Arduino to interface with the OBD2 port and transmit data to a phone app via Bluetooth for display on a heads-up display.
Replacing a Faulty OLED Screen
Initially, the project started with a DIYMall OLED screen. Unfortunately, after initializing it with the DIYMall libraries, only random pixels would light up and wouldn’t turn off. This indicated a faulty screen.
To resolve this, a replacement OLED screen with positive reviews and compatibility with the Adafruit OLED screen library was purchased from Amazon: Amazon.com: Newhaven Display Corp NHD-2.7-12864WD-F-1(RoHS).
Adding a Fuse for Safety
To protect the system, a 2A fast-blow fuse was added to the +12V power line coming from the car’s OBD2 port. This extra precaution helps prevent damage to the electronics in case of a short circuit. The fuse was installed using 5x20mm fuse PCB mounts.
The components used for the fuse protection are:
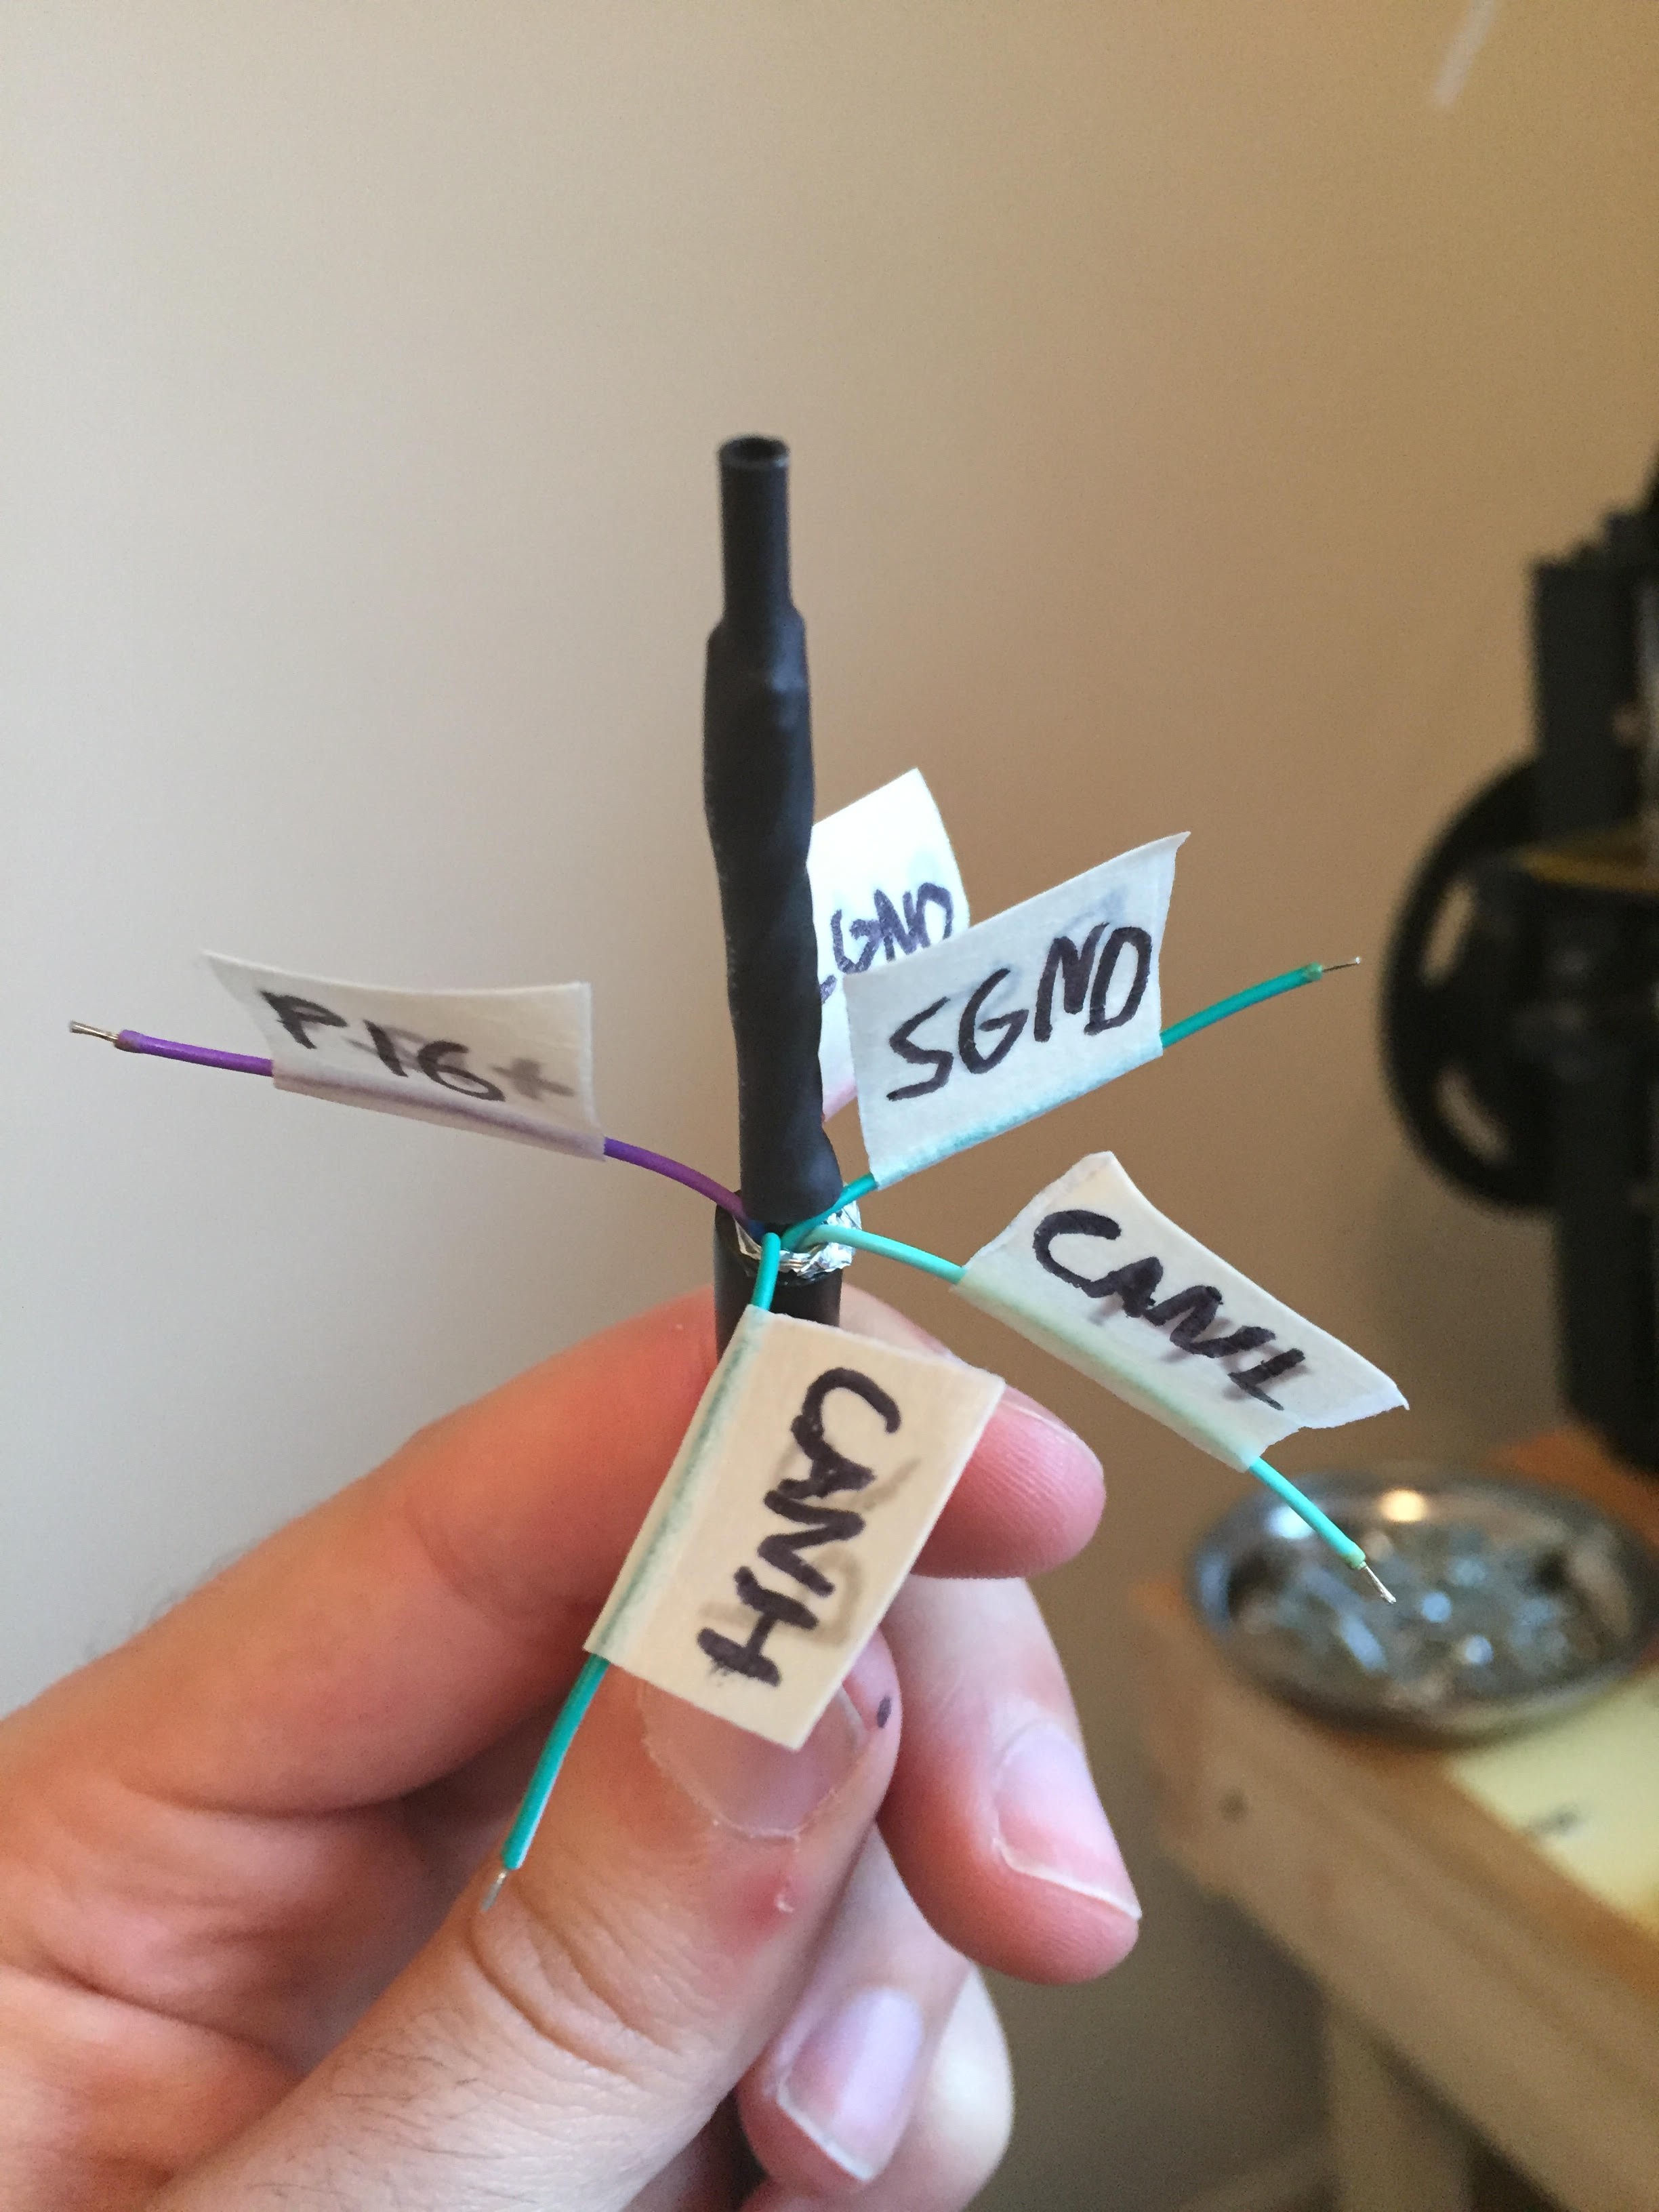
Wiring the OBD2 Extension Cable
An essential step was to wire an OBD2 extension cable correctly. Starting with the pinout diagram of the car-side OBD2 connector, only five essential pins were identified: +12V, Chassis Ground, Signal Ground, CAN High, and CAN Low.
The corresponding wires on the OBD2 extension cable were then identified using a multimeter and labeled for clarity using tape and a marker. This ensured proper connection to the Arduino.
Exploring HUD Display Options
Research led to the discovery of scope lens protectors used for gun sights. These are small pieces of glass or plastic mounted on a rail that could potentially be adapted for the HUD element of this project.
Next Steps
The project’s next steps involve:
- Connecting the modified OBD2 extension cable to the car’s OBD2 port and verifying all connections.
- Testing the functionality of the new OLED screen replacement. This ensures the display component is working correctly before integrating it into the full system. The next stage will be to program the Arduino to read OBD2 data and transmit it wirelessly.