Ensure you have a Tacklife Obd2 Wifi adapter. Plug it into your car’s OBDII port and turn the ignition on or start the engine. If your adapter has a power button, press it.
Connecting to Your Tacklife OBD2 WiFi Adapter
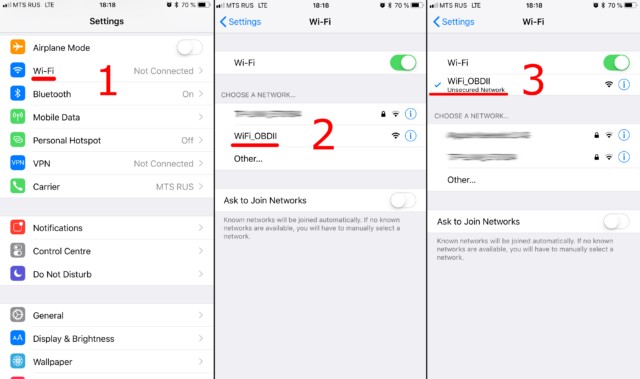
Step 1: Connect to WiFi. Open your phone or tablet’s WiFi settings and enable WiFi. Find the network created by your Tacklife OBD2 adapter (e.g., “OBDII,” “OBD2,” “WIFI_OBDII”). The name might also include your adapter’s brand. Most adapters don’t require a WiFi password. If yours does, consult your adapter’s documentation. Remember, the network name will not be your car’s brand.
Step 2: Configure Car Scanner App. Open the Car Scanner app and go to Settings (gear icon in the top right corner).
Select “Adapter” (or “Connection” in older versions).
Choose “Wi-Fi” as the connection type.
Verify the adapter’s IP address and port. Usually, it’s 192.168.0.10 and port 35000. However, some adapters differ, so check your documentation.
Finally, tap the green “Connect” button.
For future connections, ensure you’re connected to the OBD2 WiFi network and tap “Connect.” Your Tacklife OBD2 WiFi adapter will then seamlessly communicate with the Car Scanner app, providing valuable vehicle data.